My perspective of future is slightly different from the popular perception. I see a world made up of small, closely knit communities. These communities will continue to live a self-sufficient life. Self Sufficiency is not a destination but a journey.
Get the flash player here: http://www.adobe.com/flashplayer
Today I visited NC State Fair 2009. There was one hall loaded with antique farm equipment. The old farm equipment is a joy to watch. This is the beginning of life long journey to farm using the older equipment. My goal is the understand the purpose of each human or animal powered equipment and build few of them as no one builds these equipments any more.
It has been months since we have digital only television at home. We have been using the old black rabbit ear antenna since then. We were constantly adjusting the rabbit ear antenna to get reception. Today I finally decided to build my own HDTV antenna.
This antenna uses GH10- rev 2, Hoverman design from http://www.jedsoft.org/fun/antennas/dtv/gh.html
The antenna is not complete yet as I ran out of time today. I tested only the main element by hanging it from the PVC frame. I cut some reflector parts. I will install them in next few weeks.
I'm using 3/4" thick PVC pipes for frame and 1/4" Outer Diameter soft copper pipe for the metal element of the antenna.
Even without the reflector, we are getting a much better reception of all local channels. Hopefully with reflector elements we will get few more channels. I will write more about the size, cost of the parts and the building process.
This weekend I finally had some time to mount my router on router table's insert plate. This router table has been sitting un-assembled since April, 2009. It will take me another weekend to finally get this router table fully assembled.
Here are the steps:
Step 1: Mark the edge of the router base plate that you want to face front with a piece of masking tape
Step 2: Place the insert plate face down on work surface with Kreg logo close to you
Step 3: Position the bull’s eye template so that the concentric rings line up with the opening of the insert plate.
Step 4: Remove the base plate from the router and using it to find the correct drill bit size for drilling holes in the insert plate
Step 5: Place the base plate face down on the bull’s eye template and center it on the concentric rings. Use the masking tape to secure the two together
Step 6: Place a sacrificial board on the drill press under the plate to reduce the possibility of blowout
Step 7: With three items secure, drill the holes using drill press
Step 8: Clamp the insert plate to drill press and drill holes into the insert plate
Step 9: After the holes are drilled separate the three items and using a counter sink bit to counter sink each hole on the top side of the insert plate to accommodate the mounting hardware
Step 10: The screw head should not sit above flush or too far below. I used 20mm long base plate screw to connect the base plate to router
I tried to ensure that the router bit stay at the center of the circular opening of the router table's insert plate. One of the mounting screws hole is on the edge . I used a 14 mm long screw for this lower height hole.
You might be wondering, “What do candles have to do with self-sufficiency?” There is more to self-sufficiency than just surviving off the land. It’s also about freeing oneself from the material world in which makes us unhappy even anxious at times. Two nights ago, my family and I sat on the couch in the living room with nothing more than burning candles to light up the room. As we watched the glowing and flickering candlelight we suddenly felt calmer and more relaxed. Even our oldest son sat still in my husband’s lap the whole time which is a surprise. Normally during the day he’s bursting with extreme energy and constantly running around. My husband and I enjoyed a hot cup of tea over long conversations. It was very pleasant. We blew out the candles at 9:05 PM and I took our son to his room and put him to bed. When I came back downstairs and began working on dishes I noticed that my breathing had changed. It was deeper and steadier than I had ever felt. I had never felt so calm like that before. The next day our son told me how he enjoyed himself and that he wants to have more candlelight time. As self-sufficient people, it is the simple things in life that we enjoy most.
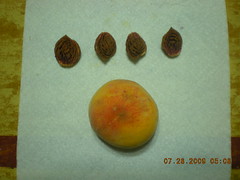
In this day and age when job losses are becoming more frequent food is a major concern for everyone. What if one can have food without worrying about having a job to pay for it? That is nothing short of possible. This peach came in a box of six and was purchased at our local farmer’s market. The peach seeds have been rinsed off and pat dry with a paper towel. They sat at room temperature to dry for 1-2 weeks and then placed inside an enveloped and sealed in a glass jar. The day we set up our farm these seeds will be sown and grown for our food. We’ll never have to worry about worry about jobs or income ever again. Our crops are the income that will feed us for the rest of our lives.
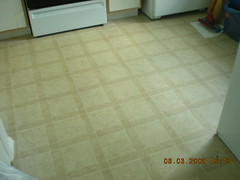
There have been many commercial cleaning products that I have used to clean the house which doesn’t exactly work the way it was supposed to. To top it all off, I didn’t feel any safer to use cleaning products which had strong, toxic fumes and were not environmentally friendly. The warning labels were just plain scary to read. I had to find a solution to this problem as soon as I could for the sake of my family’s heath and well being. Finally, I found a cleaning solution that put my fears to rest. This solution consists of 1 cup of white distilled vinegar to 1 gallon bucket of hot water. An extra bucket of hot water was used to rinse out the vinegar solution as it would dry out and damage the sponge mop, according to the directions for this vinegar and water solution. With any cleaning process, of course, there has to be ventilation. I began by sweeping away all dust and other particles that were visible. As I started using this solution on my vinyl floor I was amazed at the results. It cleaned much better than any other product I have ever used in my life. I couldn’t even smell much of the vinegar as I was cleaning. Using a pitcher of warm water, I poured a little bit on the floor at a time, mopped up the water, and wrung it into the water bucket, not the vinegar bucket. Then, whatever dampness was left I wiped it up with rags and let the floor air dry. When my job was done there was not a scent of vinegar to be detected and my floor looked better than ever. I can now clean my house with peace of mind. I will continue to search for more environment friendly cleaning mixtures that will keep my family healthy and happy for years to come.